Escalation management
Guarantee Resolutions and Service Level Agreement (SLA) with SuiteCRM Escalation
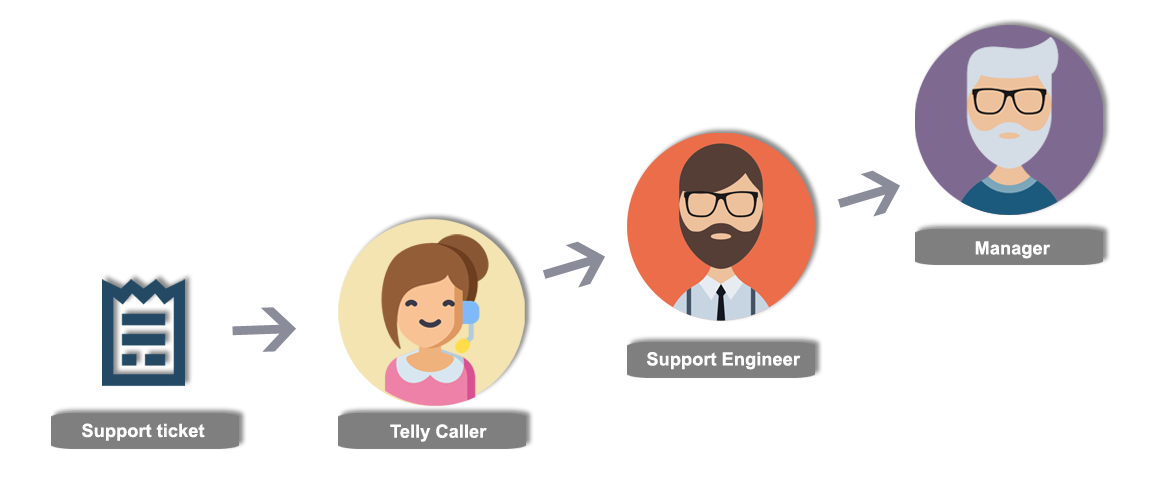
An escalation provides increased attention to a customer issue and provides a way to track the progress made in resolving the issue. For example, Incase a specific case remains idle for any reason may be missed by the case owner or he was not able to access the system or any reason or he is on leave. If you have escalation rules are defined in your work culture, It won't be the case that your customer will suffer for untimely delays. Based on the rules and time if your case is idle, It will automatically be escalated to the Reports to user or the specified Team based on the configuration.
Using Escalation management for SuiteCRM, Rules can be configured so that issues that meet user-defined escalation criteria, that is issues that need extra attention, can be automatically flagged, so that they can become more visible in a timely fashion. The escalation trigger conditions and resulting actions are user-defined.
The Case Escalation feature or in other words a Record Escalation feature allows you to configure a rule by which the case or record can be escalated to other members in the operational hierarchy. You can use Escalation Rules, to set the criteria, depending on the distribution rules of an organization.
Escalation rules automatically escalate records when the record meets the criteria defined in the rule entry. You can create rule entries, which define criteria for escalating a case, and escalation actions, which define what happens when a case escalates.
Main Features
-
Supports built-in and custom module
-
Allow custom business hours and holidays
-
The interactive screen to set up the rules criteria
-
The choice to have Escalation time based on creation or modified
-
Multiple rule entry for a module
-
Escalation by Reports to user
-
Escalation by specific user to a specific user
-
Escalation by Round Robin method for All users, Users in Role or based on the security group
How to set Escalation Rules in SuiteCRM?
-
Set up Business hours and Holidays
-
Set up Case Escalation Rule
-
Create Rule Entry
-
Define Escalation Action for the Rule Entry
-
Enable the Escalation Scheduler
1. Set up Business hours and Holidays
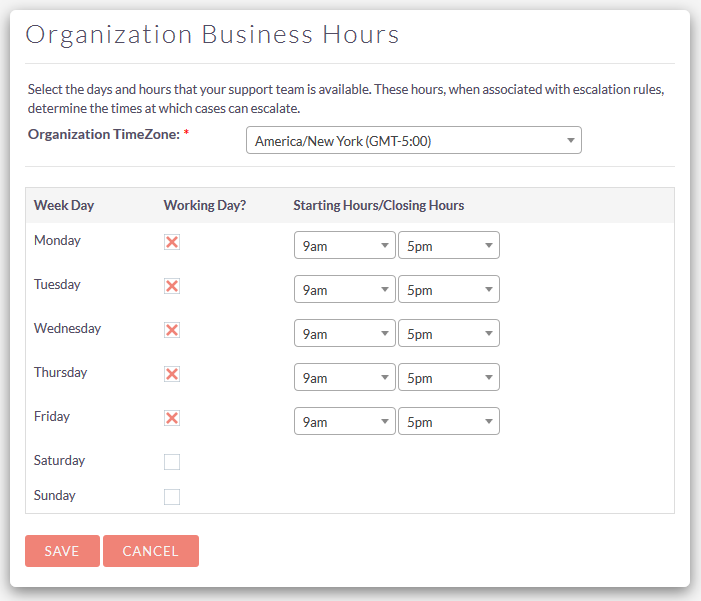
- Go to Admin -> Escalation configuration -> Organization Business Hours
- Set the business working hours
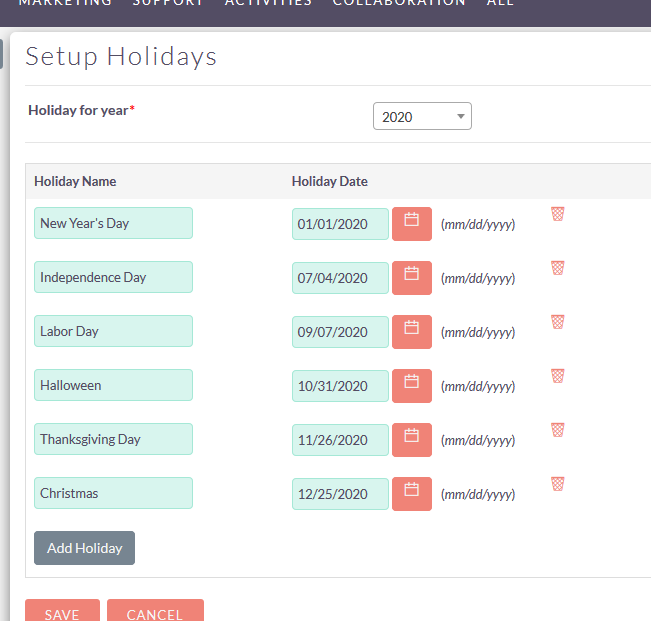
- Go to Admin -> Escalation configuration -> Holiday Details
- Set the Holidays for the year
2. Set up Escalation Rule
- Open the module Escalation Rules
- In the Escalation Rule page, click Create Escalation Rule
- In the Create Escalation Rule page, enter the Escalation Rule Name
- Select the module for which the Escalation Rule should be set
- Select the Active check box
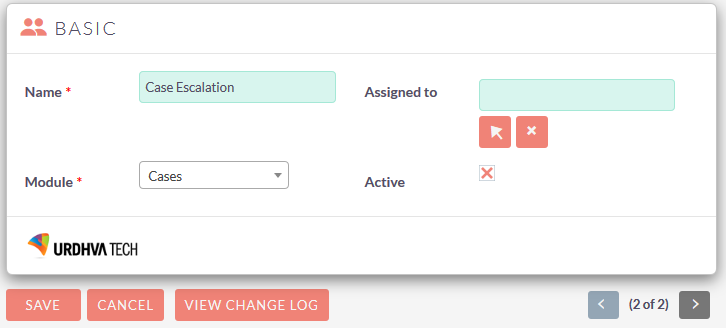
- Save the record
3. Create Rule Entry
- After creating the Escalation Rule, on the detail view of the Rule
- Click Create Rule Entry
- In the Rule Entry page, specify the criteria for the rule
- Specify how escalation times are set Based on created time or Based on last modification time
- Choose Business Hours checkbox if you wish to execute escalation based on Business Hours
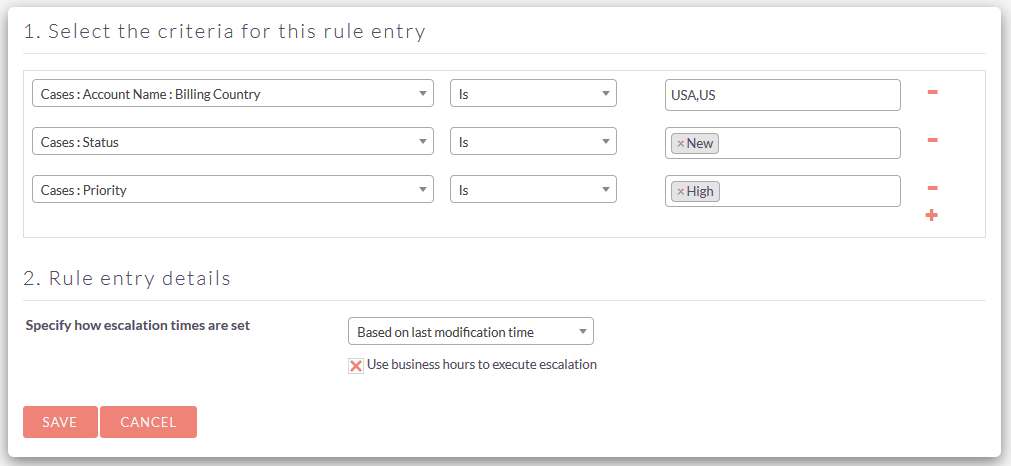
- Rule Entry Criteria: The rule entry criteria define the record's field values that trigger an escalation. If the criteria match, the record is escalated.
- Specify how escalation times are set: Specify when the escalation clock starts ticking by specifying how escalation times are set. Your selection here affects when the time period specified in the 'Time Until Escalation Action' field begins to run. You can set the Time Until Escalation Action field on the Escalation Actions page.
Based on created time
The escalation clock starts ticking when the record is created, and the record escalates when the time period set in the 'Until Escalation Action' field expires.
If 'Until Escalation Action' is set to 5 hours, then the record escalates five hours after it is created. Example: If the case is created at 9 AM on Monday morning, it would escalate at 2 PM on Monday afternoon.
Based on last modification time
The escalation clock starts ticking when the record is modified.
If 'Until Escalation Action' is set to 5 hours, then the record escalates five hours after it is last modified. Example: if the case is created at 9 AM on Monday morning and an agent modifies the case at 10 AM. The case would escalate at 3 PM on Monday afternoon, which is five hours after the 10 AM modification. - Business Hours Criteria: Business hours let you specify when your support team is available. If business hours are specified on the escalation rule, then escalation actions occur only during business hours.
If you select this option, then records are escalated during business hours that are defined for your company. Perhaps you've defined business hours as 9 AM-5 PM. If you select the 9-5 business hours, then cases would only be escalated during that time period.
4. Define Escalation Action for the Rule Entry
- In the Escalation Rule page, click the Rule Entries' criteria from the list

- In the Rule Entry page, the rule entry details are displayed
- Click New Escalation Action
- In the New Escalation Action page, do the following:
- Select the Age of Escalation Actions from the list
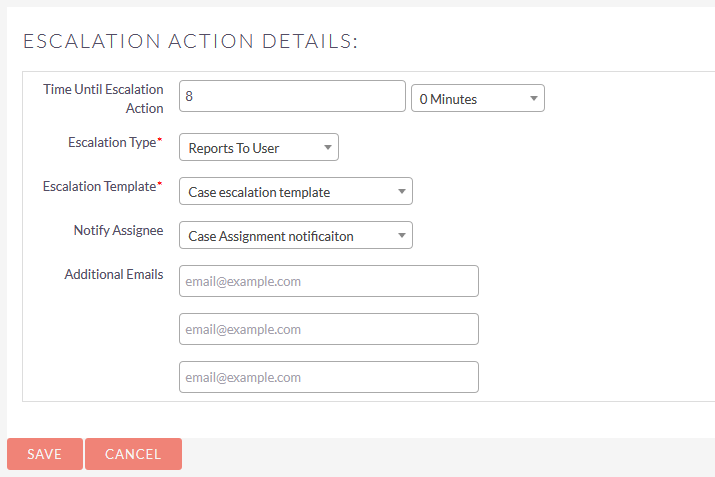
- Select the person to whom the case needs to be escalated from the Escalate To pick list
- Select the Escalate Template from the list
- Select the owner for the escalation case from the pick list
- Select the email template from the list used to Notify Assignee
- Enter the Additional Emails, if any
- Select the Age of Escalation Actions from the list
- Save
- Time until escalation action: Escalates the case if the rule hasn't been satisfied within this time period. For example, escalate the case if it hasn't been closed within 8 hours.
- Auto-reassign 'record' to: When a case escalates, it reassigns the case to a different user or team.
- Reports To User: Escalates the cases based on the organisations user's reports to. Fits best where you want the cases gets escalated to the person whom the user reports to.
- User: Select the From user and To User. Where you want to escalate the cases of specific user (From User) to a specific user (To User).
- Round Robin: Select All user or All user in role or All user in Security group to reassign the case to. When a case is reassigned, the team or user becomes the new case owner. Companies typically reassign cases to a team instead of a specific user. For example, if Level 1 support doesn't resolve a case within 24 hours, the case is reassigned to the Level 2 support team.
- Notification template for current owner: Select a notification template to use to send a notification email to the current case owner.
- Notification template for assignee: Select a notification template to use to send a notification email to the assignee.
- Additional emails: You can send notification emails to other people when a case is escalated.
5. Enable the Escalation Scheduler
- Go to Admin > Schedulers
- Click on Create Schedulers, Choose the scheduler 'Process Escalation Queue', Keep it Active and execution time to as often as possible
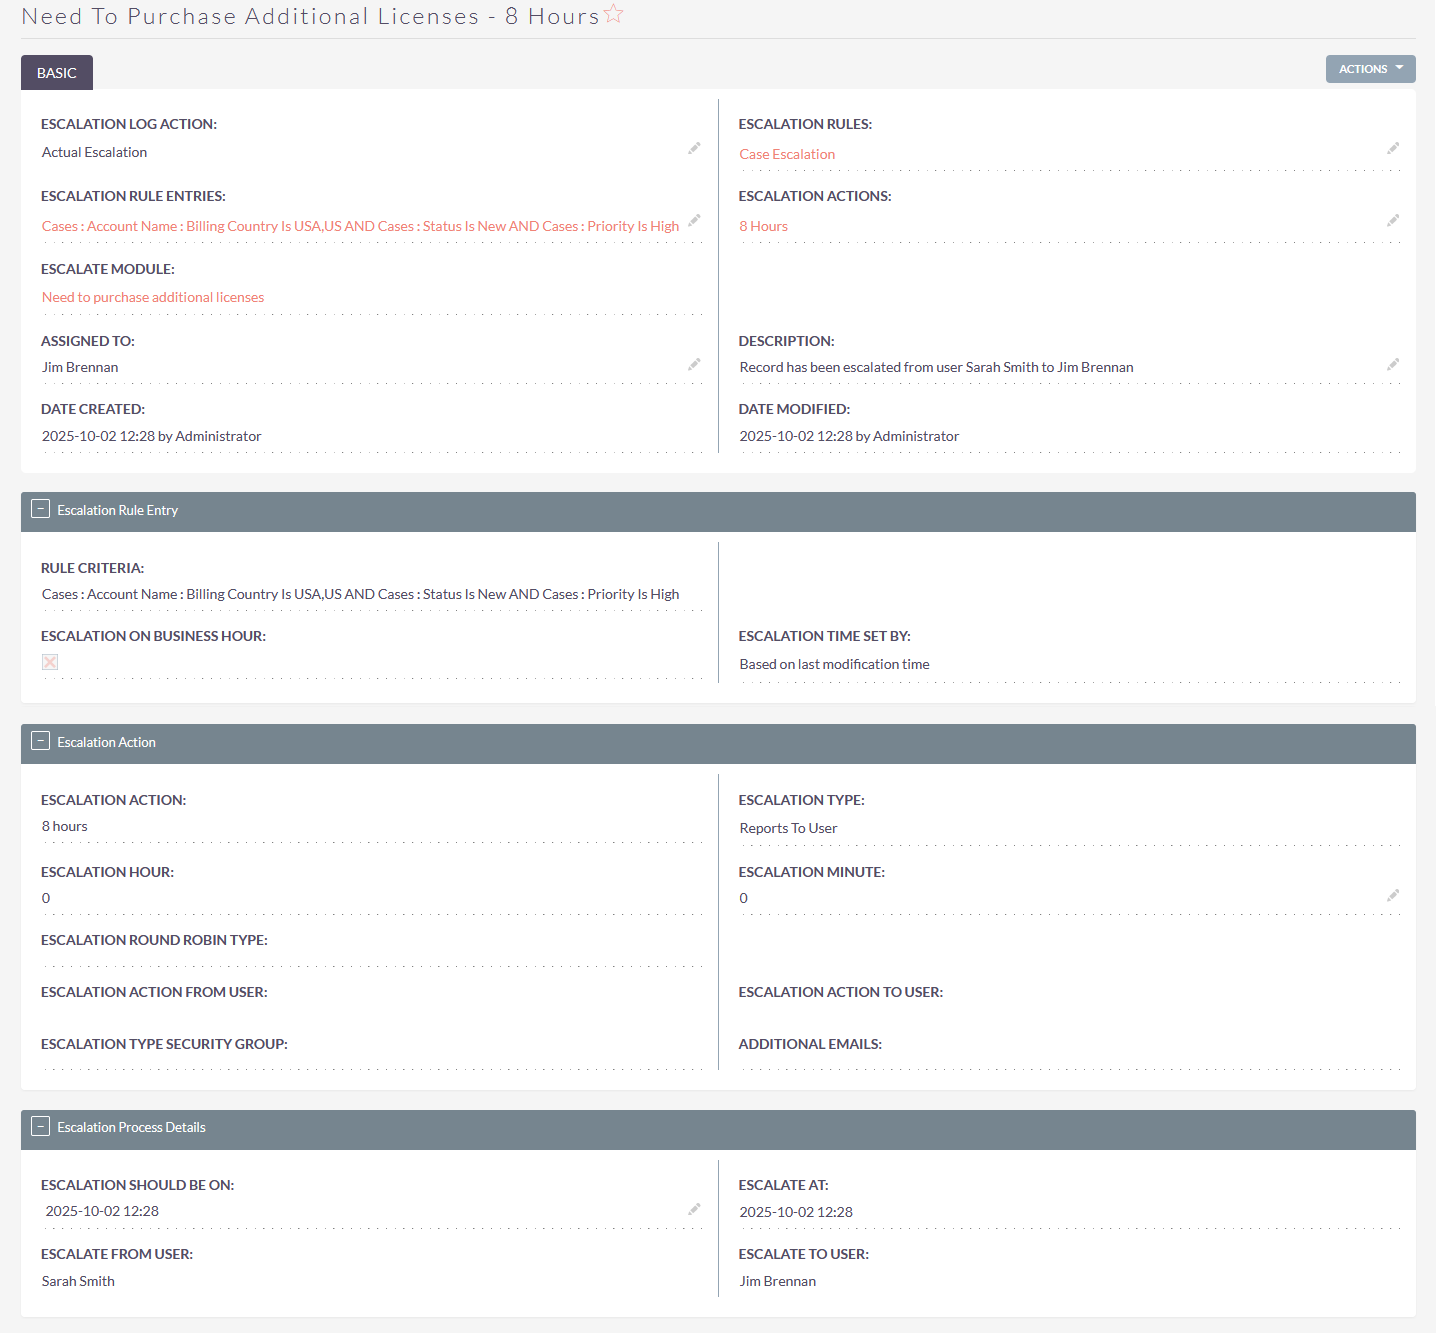
6. Escalation Log
- Escalation Log module keep the records of all the escalated records for different modules.

